
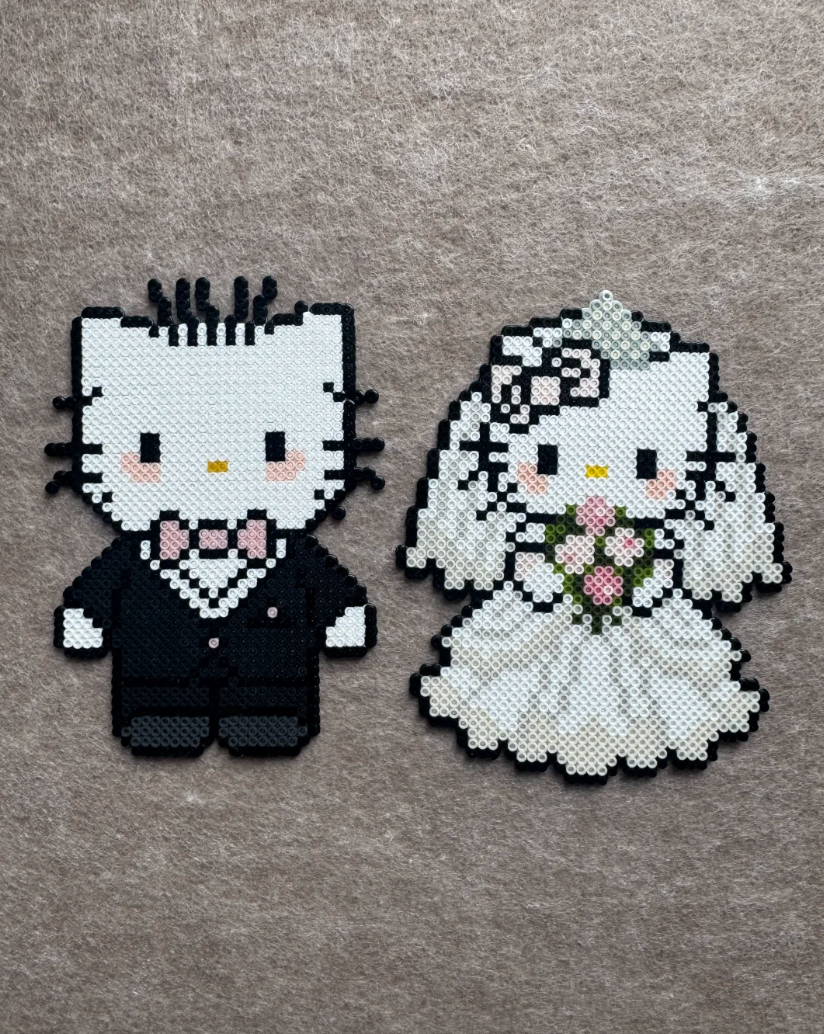
If you’ve been scrolling through Instagram, TikTok, or Pinterest lately, you’ve probably seen those colourful little beads turned into adorable pixel‑art characters, jewellery, or coasters. That’s perler beads (also called fuse beads or iron beads) – and they’ve taken the crafting world by storm.
Once seen as a simple children’s toy, perler beads have now become a go‑to stress‑relief hobby for teens and adults alike. In fact, according to recent market data, the perler beads sector in China alone generated ¥291 million (≈$40 million USD) in 2025, with year‑on‑year growth of nearly 900%. On Taobao, “perler beads” was named one of the Top 10 Products of 2025, with search volume jumping 500%. Industry watchers predict the global market could approach $1 billion by the end of 2026.
As someone who’s been in the hobby for over six months, I’ve made plenty of mistakes – and I’m here to help you avoid them. In this guide, I’ll walk you through exactly what to look for in a perler beads kit, what tools you really need, and how to start your first project without wasting money.
What Are Perler Beads – and Why Is Everyone Obsessed?
Perler beads are small plastic cylinders (usually made of polyethylene or ABS) that you arrange on a pegboard to form a pixel‑style design. Once your pattern is complete, you cover it with a special ironing paper and apply heat with a mini iron – the beads melt slightly and fuse together into a solid, durable piece.
So why the sudden craze? Three reasons:
- Low barrier to entry – No art skills? No problem. Anyone can follow a colour chart.
- Meditative & relaxing – Placing each bead with tweezers is incredibly soothing; it’s like a digital detox for your hands and brain.
- Instant gratification – In just 1–2 hours, you have a physical, display‑worthy item – a fridge magnet, keychain, coaster, or even wall art.
During the 2026 Lunar New Year holiday, orders for perler beads kits among Gen Z shoppers jumped over 9,000% compared to the previous year. It’s not just a fad – it’s a full‑blown creative movement.
Why Buying a Complete Kit Is Smarter for Beginners
When I first started, I tried buying beads, boards, tweezers, and irons separately – and I ended up with incompatible sizes, wrong colour codes, and a lot of wasted money.
A starter perler beads kit solves all that in one box. You get everything matched and ready to go. But not all kits are created equal. Here’s what you need to check before clicking “buy.”
The Ultimate Perler Beads Kit Buying Guide (Save This!)
1. Colour Count – 48 or 72 Colours Is the Sweet Spot
More colours aren’t always better. For a beginner, 48 to 72 distinct shades give you enough variety for 90% of the patterns you’ll find online (think Pokémon sprites, anime icons, floral motifs). Kits with 24 colours are too limiting, while 144+ can be overwhelming and unnecessarily expensive.
Start with 48‑72 colours, and once you’re hooked, buy refill packs of the shades you use most.
2. Essential Tools – What Must Be Included
A decent starter kit should contain all of these basics:
- Perler beads (obviously) – in the colours you chose.
- Pegboards – at least 2–4 square boards (standard 52‑pin size is best for versatility).
- Tweezers – curved or straight? I recommend curved – they give better grip and less hand fatigue.
- Mini iron – crucial: not every kit includes one, so read the description carefully!
- Ironing/parchment paper – the heat‑resistant sheets for fusing. Never use regular kitchen paper – it will melt onto your iron.
- Masking tape – for the “tape method” (optional but super helpful for large projects).
Some premium kits also throw in a storage case, a bead scooper, and printed pattern booklets – nice extras, but not deal‑breakers.
3. Quality & Safety – Non‑Negotiable
This is where many cheap kits cut corners. Always look for:
- Material certification – preferably EU EN71 or US ASTM F963 toy safety standards. This ensures the plastic is non‑toxic and phthalate‑free.
- Smooth, burr‑free beads – run your fingers over a few; they should feel even and clean.
- No strong chemical odour – if the package smells like cheap plastic the moment you open it, send it back.
Also check that the beads are uniform in height and diameter – uneven beads won’t fuse properly, ruining your final piece.
4. Colour Compatibility – Stick to a Universal Standard
Not all brands use the same colour numbering system. The most widely adopted is the “Mard” standard (used by major manufacturers). If your kit follows that, you can easily download free patterns from community sites and swap colours without confusion.
If you plan to buy extra beads later, stick to the same brand and colour system – even the same colour code from different makers can have slight shade variations and different melting temperatures.
How Much Does It Really Cost to Get Started?
- A single small project at a physical DIY studio costs about $5–8.
- A full 48‑colour starter kit (with all tools) typically ranges from $15 to $35, depending on brand and quality.
That means one or two studio sessions can pay for a kit that gives you dozens of projects at home. The value is unbeatable – plus, you can craft whenever you want, in your pyjamas.
Perler Beads in 3 Super‑Simple Steps
Step 1 – Pick a Pattern
Start small – aim for a design that fits within a 20×20 pegboard (e.g., a simple heart, a strawberry, or a classic game character). You’ll find thousands of free patterns on Pinterest, Reddit (r/beadsprites), or dedicated perler‑beads blogs.
Step 2 – Place Your Beads
Using your tweezers, place each bead onto the pegboard pegs according to the colour map. A pro tip: start from the outline – if you can close the outer border, you know the inner area will match perfectly.
Step 3 – Iron & Fuse
Once the design is complete, place the ironing paper over the beads and gently run your mini iron in circular motions until the beads melt just enough to stick together. Important: Use only the special heat‑proof paper supplied with your kit – never substitute with baking parchment, as it will fuse to the plastic and ruin your iron.
After cooling, peel off the paper and – voilà – your beads are now a solid artwork. Attach a magnet, a keyring, or simply frame it.
✨ Ready to Start Your Perler Bead Journey?
We designed our 2026 Premium Perler Beads Kit with everything we wish we’d had as beginners: 72 vibrant colours, a full‑size mini iron, 4 durable pegboards, premium tweezers, and all the safety certifications (EN71 & ASTM) you can trust.
No guesswork. No missing pieces. Just creative fun, right out of the box.
👉 Check It Out NowFinal Thoughts – Is a Perler Beads Kit Worth It?
Absolutely. In a world of endless scrolling and digital noise, perler beads offer a tactile, mindful escape that leaves you with something beautiful and tangible. The learning curve is shallow, the community is incredibly supportive, and the creative possibilities are endless.
If you’re ready to start your perler‑bead journey, the most important decision is picking the right starter kit – one that includes quality beads, complete tools, and clear instructions. We’ve tested and curated every piece so you don’t have to guess.
Have you tried perler beads before? Drop a comment below with your favourite project – we’d love to see it!
*Disclaimer: This post contains personal experiences and suggestions. Some links may be affiliate or promotional links. Always verify product details and safety standards before purchasing. Happy beading!*